Thinking of starting to grow your own food or need to kick start your plants' growth? Home-made compost is what you need.
There are three steps to making compost.
1. Compost box/container
2. Compost Mix
3. Composting
Today I'll be covering the first step, which is to create the box. There are several types of different boxes, but the best (at least in my opinion) is the wood and wire box. To build a 2x2x2 composting box, you will need:
-5-6 8-foot 2x4s (non-arsenic pressure treated, cedar or stained)
-Around 10 square feet of hardware cloth
-100 3" Robertson wood screws
-100 2" Robertson wood screws
-250 staples
-Staple Gun
-Screwdriver (preferably a power-tool though)
-Drill
-Small drill bit (for pre-drilling holes)
-Saw (preferably a table saw or a circular saw)
-Wire-Cutters (or anything else that can cut through hardware cloth)
-Some good music
There are a couple things you should be mindful of while making the boxes, I learned these while making mine.
- ALWAYS pre-drill holes
- Soak your drill-bit in water before touching it
- Do not fight the wood, a bit of muscle is O.K., but don't try to screw through knots
- Wear safety goggles
- Be very careful with the hardware cloth
- Measure twice, cut once, then measure again
- Don't try to unjam the staple gun while the safety's off
- Take notes so that you next box is even better
- Keep you sawdust for composting
- It doesn't have to be perfect.

 |
| The screws MUST go in on opposite sides |
 |
| Make sure you cuts are as precise as possible |
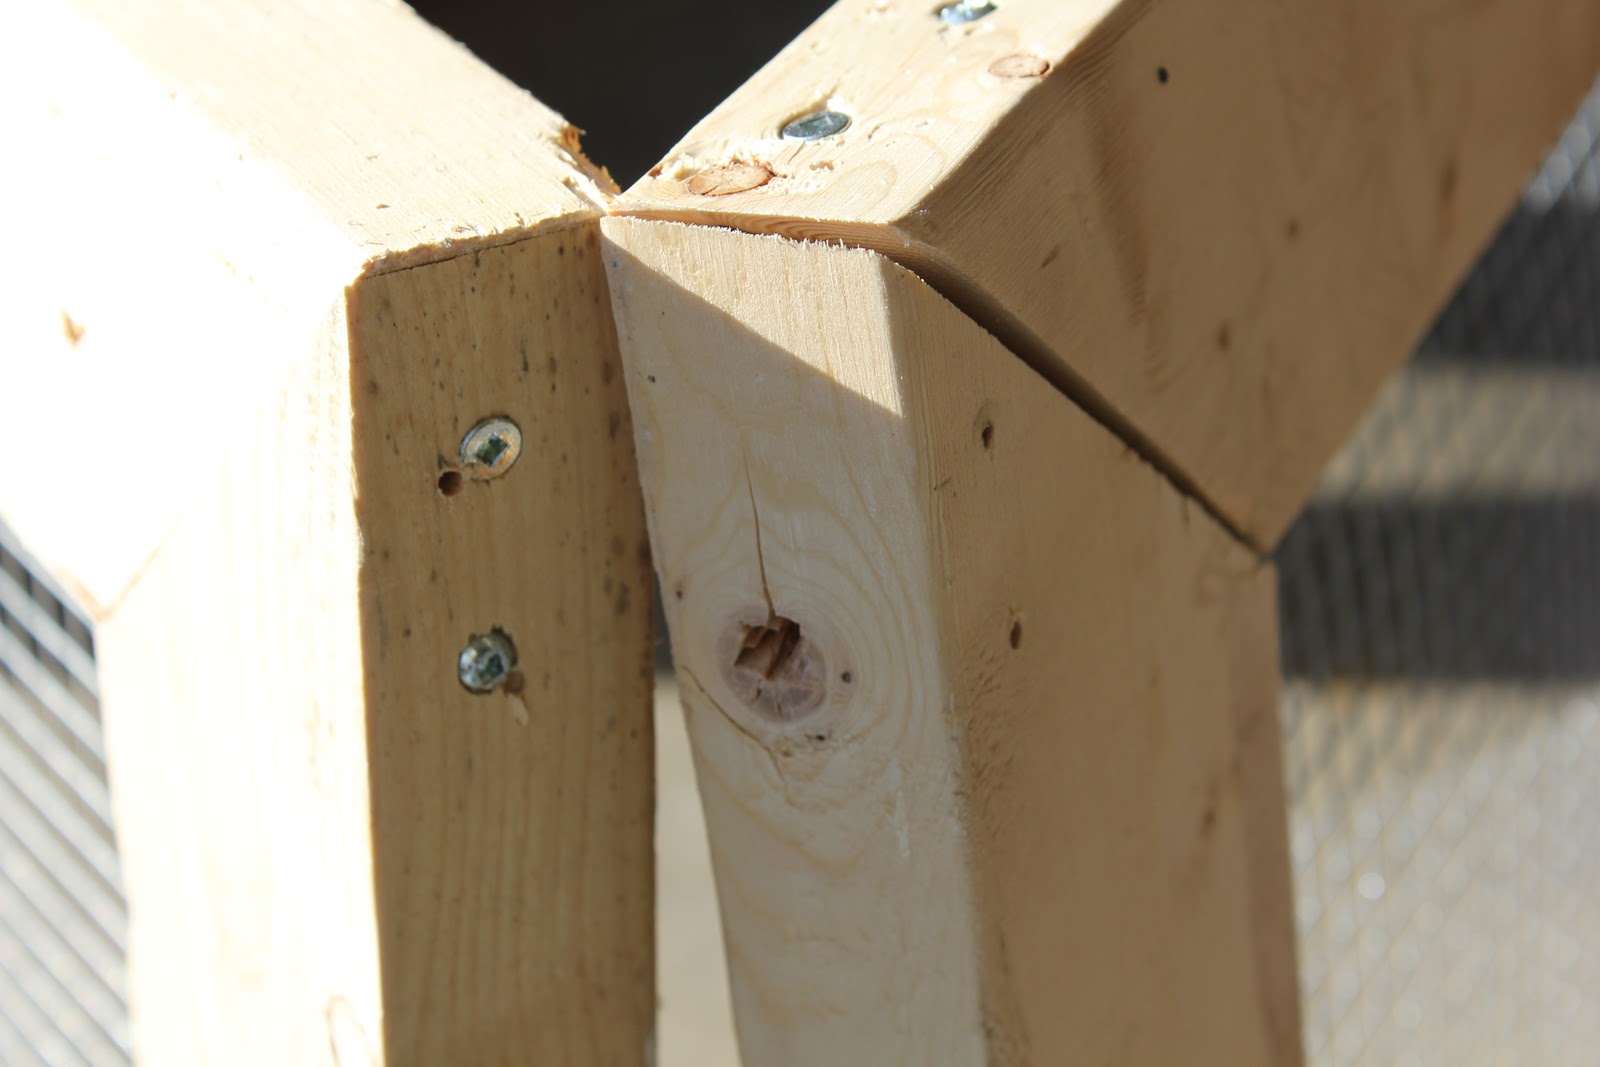
The first thing you need to do is measure out 2 foot lengths on your 2x4s. Use something to give you a 45 degree angle like in the top picture. We're gonna do 45 degree cuts so the board will be cut like this the image to the left. The distance between the two farthest parts should be 2 feet. Once you have four pieces, you're gonna want to assemble your first frame. To do this you must line up two of the 45 degree cuts and put one 2'' screw about half an inch from the corner and one 3'' screw about half an inch from the 2'' screw into the frame. The screws MUST go through both sides of the opposite boards, and not just one set of screws on each of the far corners of the boards (See picture number 3, on the right side). Once the first frame is put together, you're gonna want to do the same thing 3 more times to create the other frames (ONLY THREE MORE TIMES, the bottom is different).
Once you have your four frames, you will have to make the wire-mesh for it. First, measure the gap in between the wood in your frame, then add 2 inches to that number both ways. so if your frame is 22''x 26'', you will cut a 24''x28'' piece of hardware cloth. Be careful cutting the wire, it's very easy to get cut. Once you have cut the cloth, staple it to the frame (staple it to the ugliest side of the frame, it's going to be the inside of the box) using the staple gun. Once you've finished the first, just repeat it three more times.
 |
| The completed frames |
 |
| NOT LIKE THIS |
 |
| Like This |
Once the frames are completed, you will have to get them together. Line up the frames as shown in the picture and screw EXACTLY as show. Once you have done both top and bottom on both sides, you are ready attach the bottom piece.
 |
| Hardware cloth cut and ready to be tacked on |
You simply want to do the same as the hardware cloth step, measuring the gap and adding two inches and attaching the cloth to the bottom of the box. This is to aid in the turning (if you choose to turn your compost, although it isn't necessary). To reinforce the box, run 3 or 4 pieces of 2x4 along the bottom (from ground up it goes 2x4, hardware cloth, frame).
 |
| Reinforcing the bottom of the box |
You can make several of these to increases the speed of your composting. I just posted about aerobic compost mix, so that's definitly the best place to find step 2 of the project.
 |
| If you have any questions or are in need of further information contact me at (click) or comment and I will get back to you as soon asas possible |
The blog is excellent, and your How-to was a pleasure to read. Keep up the excellent work.
ReplyDelete